Quick start
Getting Braid up and running couldn’t be simpler, but if you’d prefer a deep-dive into the documentation instead, start with the Requirements.
Prerequisites
Before you start, you’ll need to make sure you at least have a working Laravel 11 app ready to rock, and are using Composer. See the Requirements page for detailed info.
Installation
First, use Composer to install Braid within your existing Laravel project:
1
composer require njpanderson/braid
Once the Braid package files are installed, run the following artisan command to install the core files:
1
php artisan braid:install
This will install the service provider, front-end assets and a configuration file.
Creating the pattern layout
Every time Braid loads a pattern, it does so through a consistent layout view. This is to ensure that the same page assets (such as CSS and JS) are used in pattern displays.
Braid ships with an example layout file just to make sure things load, but it won’t be very useful. You’ll likely want to replace it with something similar to your own layout file almost immediately.
Simply create or edit the file at ./resources/views/vendor/braid/layouts/pattern.blade.php to create a new layout. Here’s an example:
1
2
3
4
5
@extends('layouts.main')

@section('body')
    @yield('pattern')
@endsection
In the above example, the layout file extends an existing site layout, which contains all the <head> and script markup needed, as well as yielding a body section.
The only required part of a Braid pattern layout file is the following:
1
@yield('pattern')
This will dictate where braid places the pattern file when being viewed.
Tip: Your pattern layout file should ideally be as plain as possible, containing no visible markup except for the pattern itself. This will enable you to view patterns in a properly isolated manner and have them respond well to screen size changes.
Deciding which templates to show
Braid will automatically map pattern definitions to view files in the same path. For instance, a pattern at \Test\Patterns\Components\Button will show the view at components/button.blade.php.
This will work for any Laravel or Livewire component, include or partial.
If you don’t want your pattern structure to follow the view files, each pattern can be overridden with the $viewName class property. This is especially useful if you want to create a completely independent menu structure in Braid.
Setting up your first pattern
Once you’ve decided which partial, component or Livewire component to show in Braid, create a Pattern file in the same subfolder within your patterns namespace. For instance, given our button example with a view file in ./resources/views/components/button.blade.php:
1
2
3
4
5
6
7
8
{{-- /resources/views/components/button.blade.php --}}
<button
    {{ $attributes->class([
        "border rounded-md border-sky-400 shadow-md ..."
    ]) }}
>
    {{ $slot }}
</button>
The following pattern definition could be created at ./tests/Patterns/Components/Button.php:
1
2
3
4
5
6
7
8
9
10
11
12
13
14
15
// tests/Patterns/Components/Button.php
namespace Tests\Patterns\Components;

use Illuminate\View\View;
use njpanderson\Braid\Base\ComponentPattern;
use njpanderson\Braid\Contracts\PatternContext;

class Button extends ComponentPattern {
    public function contextData(string $context): PatternContext|View
    {
        return $this->makeContext(
            slot: 'Button'
        );
    }
}
Navigate to /braid and the following screen should show:
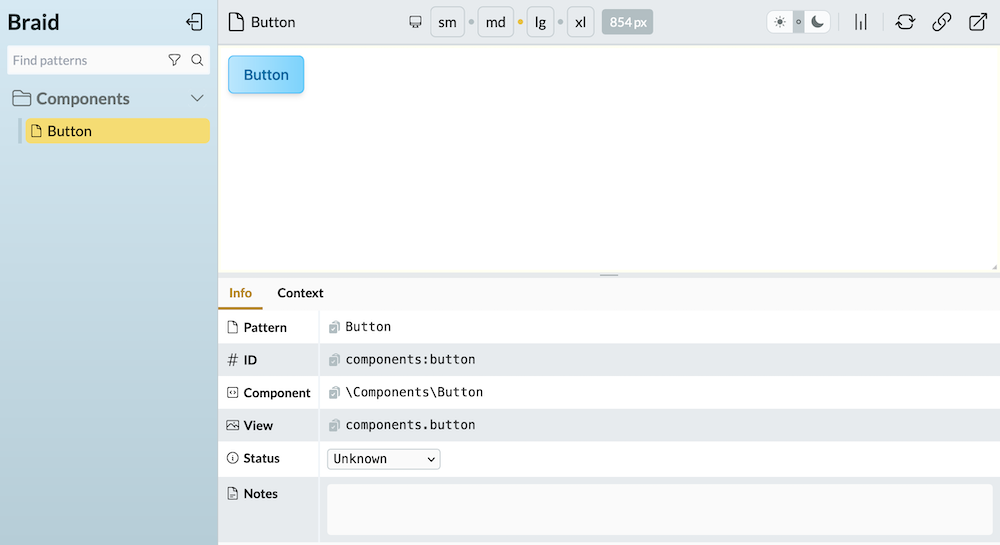
Hopefully you’ve got Braid up and running in a usable state. Now it’s worth looking at how contexts work, which is where the really useful stuff starts to happen.